
Enable JavaScript in Chrome
This guide will step you through the process of enabling JavaScript in Google Chrome.
These screenshots are taken in Chrome on Windows but the process is identical on Mac and Linux computers.
-
Click the "Customize and Control" button
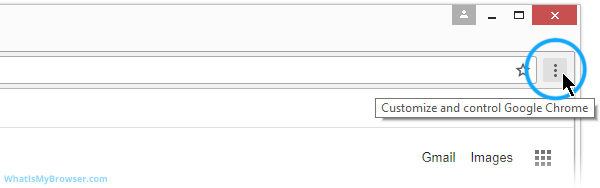
This will reveal a menu with lots of options. One of them will be named "Settings".
-
Select the "Settings" menu item
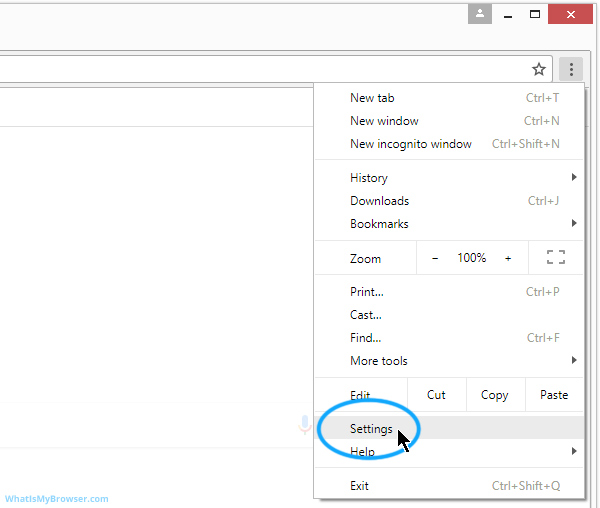
The Settings screen will now appear.
-
Search for the JavaScript settings
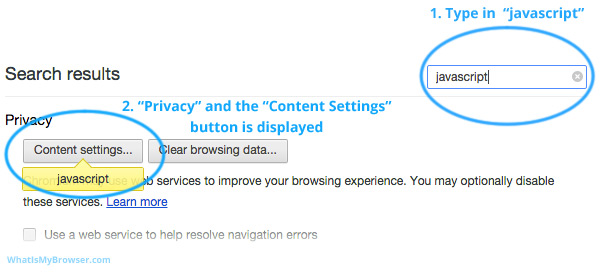
As you type in "JavaScript" (it's not case sensitive) you will see Chrome start to change what's shown on the settings page. It will reveal the "Privacy" section and highlight the "Content settings..." button with the yellow "JavaScript" callout.
Click the "Content settings..." button.
You are then taken directly to the JavaScript setting.
-
Change the JavaScript setting
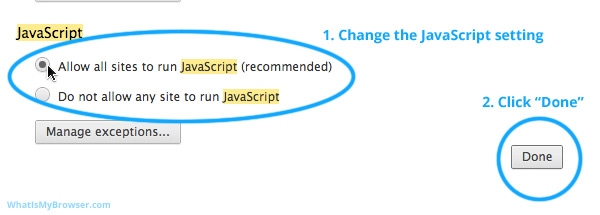
You can now choose "Allow all sites to run JavaScript" to enable/activate JavaScript, or "Do not allow any site to run JavaScript" to disable JavaScript.
If you want to only run JavaScript on certain websites, you can use the "Manage exceptions..." button to control which websites JavaScript will and will not run on.
Once you have made your setting (either enabled JavaScript or disabled it), click the "Done" button to confirm your choice.
You will then be returned to the main Settings page tab. You can now close this tab and resume your normal web browsing with your new setting.
-
JavaScript is now enabled
Congratulations, you just enabled JavaScript. Click here to confirm that JavaScript is now enabled.
Looking for guides to enable JavaScript in other web browsers?
Here are some guides for other web browsers like Safari or Firefox.